Several people have asked me to describe how to create mock Magazine Covers after I posted this image to the Facebook fanpage ” Support Group for PicturePlusaholics”
The process breaks down fairly simply:
- Have a fun idea for a card
- A good quality photograph of the person that works with your idea
- Examples of the magazine you want to emulate and
- An image editing program you can use to put it all together.
Assuming you have the idea and the images you want to start with, the next part is the tech of assembling multiple images. To do this you need to have a program that allows you to remove or ‘erase’ unwanted parts of images.
You can use Photoshop if you have it, or PaintShop Pro, etc*. I use a powerful (and free) tool called Paint.Net. Features Download Link
I use this one because it can do anything you want it to with a little practice. There’s a bit of a learning curve at first to get the hang of it, but I think those of you already familiar with using SendOutCards’ awesome PicturePlus interface will catch onto it pretty rapidly.
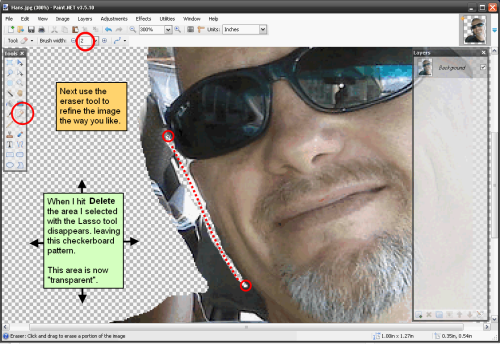
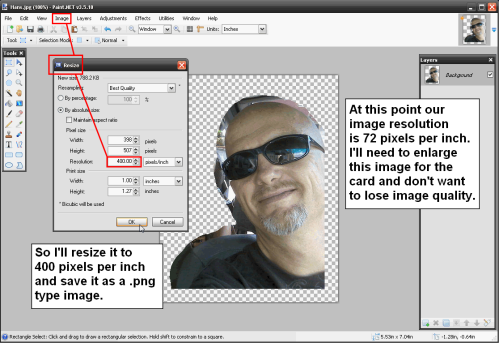
When you add elements to a PicturePlus card you’re using an image type that has a ‘transparent’ background’, which allows other images on the same page to show up as well, depending upon whether they’re ‘above’ or ‘below’ the other images. Same concept here. You need to be able to edit an image and save it as an image type called ‘Portable Network Graphics’ or ‘.png’, to preserve the transparency of any area you’ve just erased. (If you erase an image area and save the result as a ‘jpeg’ type image you’ll find your erased area is filled with white. )
My friend in this card is the Uber-geek type, a Dad and a fellow SendOutCards Rep, so when I noticed his birthday approaching I wanted to send him something special. “WIRED” magazine seemed kind of appropriate as he’s a Marketing maven, tech blogger and a founding Earthlink alumnus.
I needed an image for the card – without asking him for one – so found this shot on his Facebook gallery.
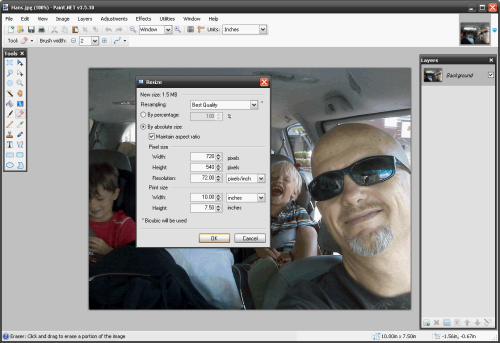
I saved the image and opened it with Paint.Net. The image size is 720×540 at 72 pixels per inch. At this point all I need to do is erase the background area.
NOTE: Depending on the browser you’re using clicking ON these images will enlarge them enough to show detail and text.
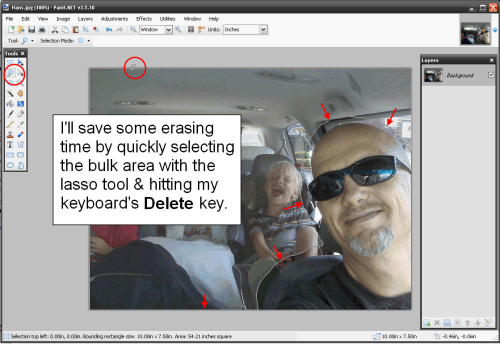
Now to take out the unwanted parts of the image.
Next step is to refine the cutaway using the eraser tool.
To preserve image clarity I’ll amp up the pixels per inch a bit, prior to enlarging it for the card.
Now you’ve got a usable image for composing your magazine cover.
* Just as a quick note there are other program options I found here at ilovefreesoftware.com and Digital Inspiration.) Haven’t tried these but will check them out and see how well/easily they run.
Next post: Make a template the right size for a card.


