Several people asked me to describe how to create mock Magazine Covers after I posted this image to the Facebook fanpage ” Support Group for PicturePlusaholics”
This is the third installment about turning a friend into a magazine cover. (If you missed Part 1 you can see it HERE.) ( If you missed Part 2: HERE.)
This is a birthday card for a friend of mine. I decided to use WIRED magazine because he’s tech-oriented, a blogger and marketing consultant.
So we need a tech sort of background. I want something that communicates the tech idea without being too distracting from the text I’m going to add.
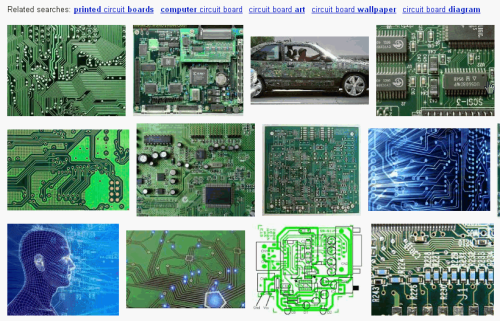
A Google Image Search of “circuit board” turns up these images:
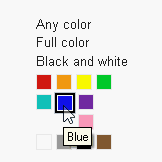 Pretty cool but I think blue will work better than green so I filter the search (This is one of Googles COOLEST new search features – selecting the primary color of the image search) Like this:
So if you’re making someone a card and want YELLOW flowers click the yellow and Google will only display the yellow ones! Click LARGE and Google will only show you the Large, Yellow images. Totally cool.
Rather than show the blue Search results I’ll show the one I picked:
 I add it to the card image by right clicking on it, selecting Open with Paint.Net, then Edit/Select All, Edit/Copy — this puts it in clipboard memory — now as I’m going to add it above the Background layer I highlight that layer in the Layers toolbar and select Edit/Paste in New Layer.
NOTE: Depending on the browser you’re using clicking ON these images will enlarge them enough to show detail and text.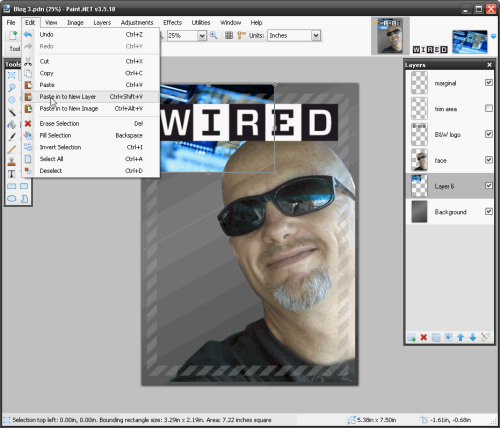 When it pastes it drops into the upper left-hand corner. Hardly big enough to fill the card, but we can stretch it. That’s going to blur it a bit but this’ll be okay as it’s just our background anyway. (Here’s a tip: Since we’re going to do a LOT of stretching to enlarge that circuit image enough to make it entirely FILL the background and then move it around a bit to where it looks best, you’ll find it easier to give yourself some room by using the Window magnification setting to back the view off a couple of clicks first).
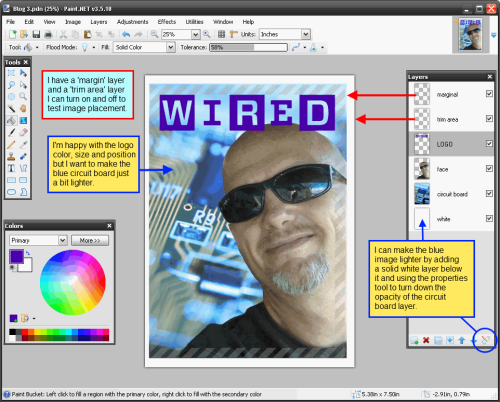
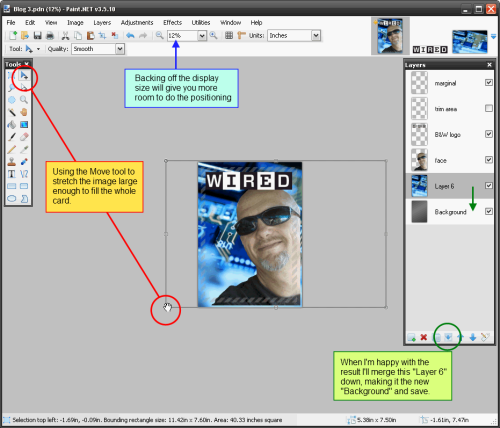 I’m happy with the size and placement with this, so the next step will be to make the black and white logo a different color.
These samples show the logo can be whatever color seems right for the month’s issue design.
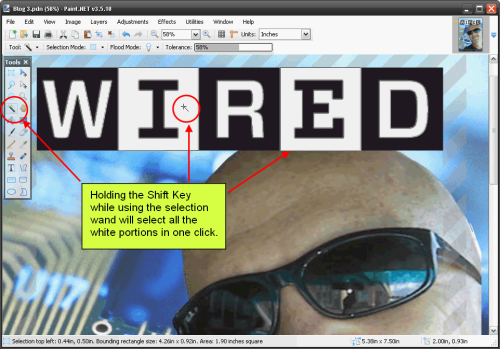
 Since my circuit board background is mainly Blue and I want the warm face color to stand out, I’m going to try Violet for the logo. Right now it is solid black and white. I want to select all of the white and delete it. Then I want to select all of the black and replace it with Violet.
Holding the Shift Key when you select part of the White area will select all of that color on the layer. You can select multiple areas by holding the Control Key instead. So I select all the White and press the Delete keyboard button or select Edit/Cut – your choice. That leaves the black area we can now select and recolor to our liking. 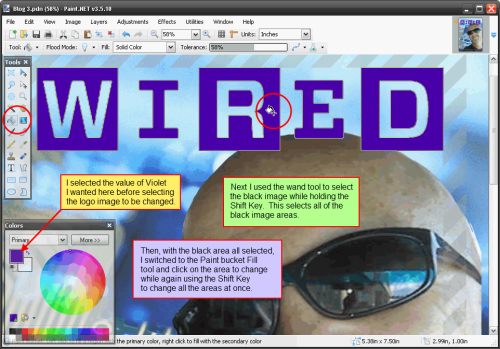
(As a note, I might want to look at the logo in several different colors. I can leave the black logo image on one layer, select its area, create a NEW layer and paste my test color into the selected area, change colors, create ANOTHER layer and paste the new color there — all while leaving the image area selected.)
That will allow you to turn on/off the visibility of the different layers to see which color works the best.
Everything looks good so far. Now we can add text and finish it up.
My next post will cover working with text – tips on finding and using different letter fonts, simpler techniques for sizing, arranging & positioning, etc.
Next Post: Working with Text

